Shaders can be a mysterious topic for game developers not yet familiar with them. And seeing some of the wild things people can create with them (for example, on Shadertoy), they can even be ominous. It’s a whole new language and framework you have to learn in addition to Godot!
In this tutorial, I want to breakdown the process I used to create a simple procedural eyebrow shader for TriEdge Hack to help those who are learning about shaders but aren’t sure of the process of creating one from scratch. Specifically, we will look at how to do this in a Godot 2D environment.
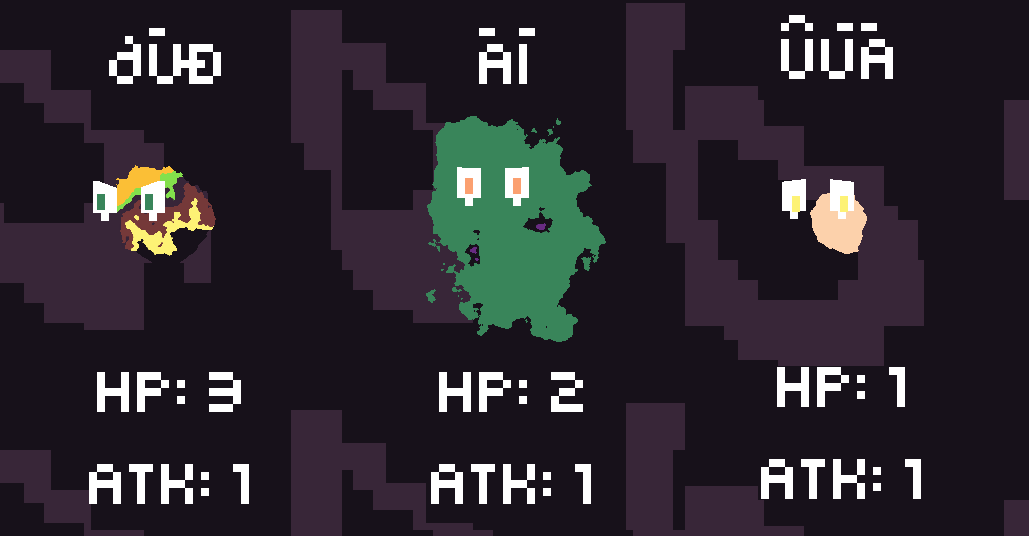
Here is what we want to accomplish:
This is a nice shader to create as a beginner because it does not depend on time. Let’s get started!
Node setup
In my setup, I use two Sprite2D nodes: One for the white part of the eyes, and the other for the pupils. I do this for TriEdge Hack so I can animate the pupils separately, though for this tutorial you could also use just a single image like this one:
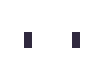
It’s important for the image to be symmetric for our shader, so if you are using your own image make sure each eye is spaced accordingly.
First steps
I’ll cover some shader basics as we go, but for those who are looking for a more comprehensive resource I highly recommend The Book of Shaders and the official documentation’s Your first 2D shader.
For this tutorial, we are going to create a fragment shader. This kind of shader runs on every pixel of your sprite and determines what color it is.
Let’s attach a shader to our sprite node now. Select your sprite, and under the inspector find the Material property in the CanvasItem -> Material group. Give it a New ShaderMaterial. Under that material, give it a New Shader. You should end up with something like this:
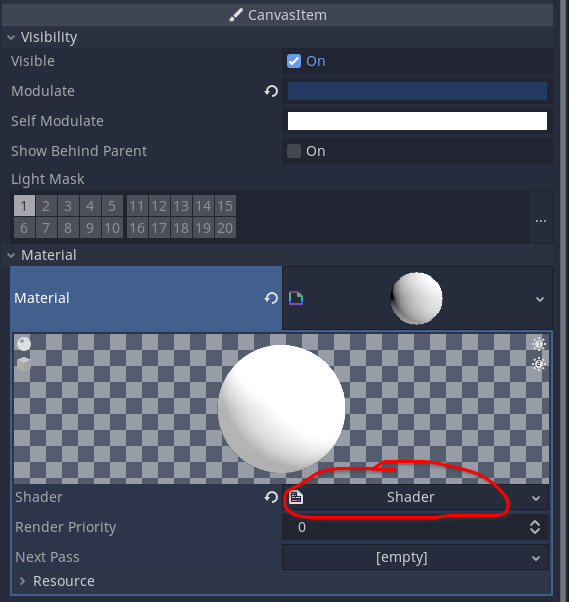
Once you click on the circled Shader, the Shader text editor should open and we can start experimenting! Let’s start with the beginner shader from the Godot tutorial, and build up to the eyebrow shader.
shader_type canvas_item;

void fragment(){
  COLOR = vec4(0.4, 0.6, 0.9, 1.0);
}
The first line just tells Godot what kind of shader we are writing. What we really want to focus on is fragment(), which is a special function
we can overwrite to set the color of individual pixels by setting the COLOR. For every pixel in our sprite (even the transparent ones), the shader tells that pixel to be this color.
At this point your sprite containing the eye texture should just look like a blue rectangle. Next, let’s look at some other useful building blocks before building our final shader.
Building Blocks
One of the things that can be intimidating about shaders is the many functions available for you to use. We’ll just focus on the ones we need.
We don’t have usual print statements to debug our shader. Instead, we can use the COLOR output as we are constructing our shader to visualize what is going on. Let’s use this to understand our building blocks.
UV
Our current shader is blue everywhere. How can we adjust the shader’s behavior depending on which pixel it’s running on? That’s where UV comes in.
UV is a normalized coordinate system we can use in our shader. The U coordinate corresponds to the X coordinate of our image, but instead of being expressed in number of pixels, it’s expressed in a range from 0 to 1. Similarly, V corresponds with Y.
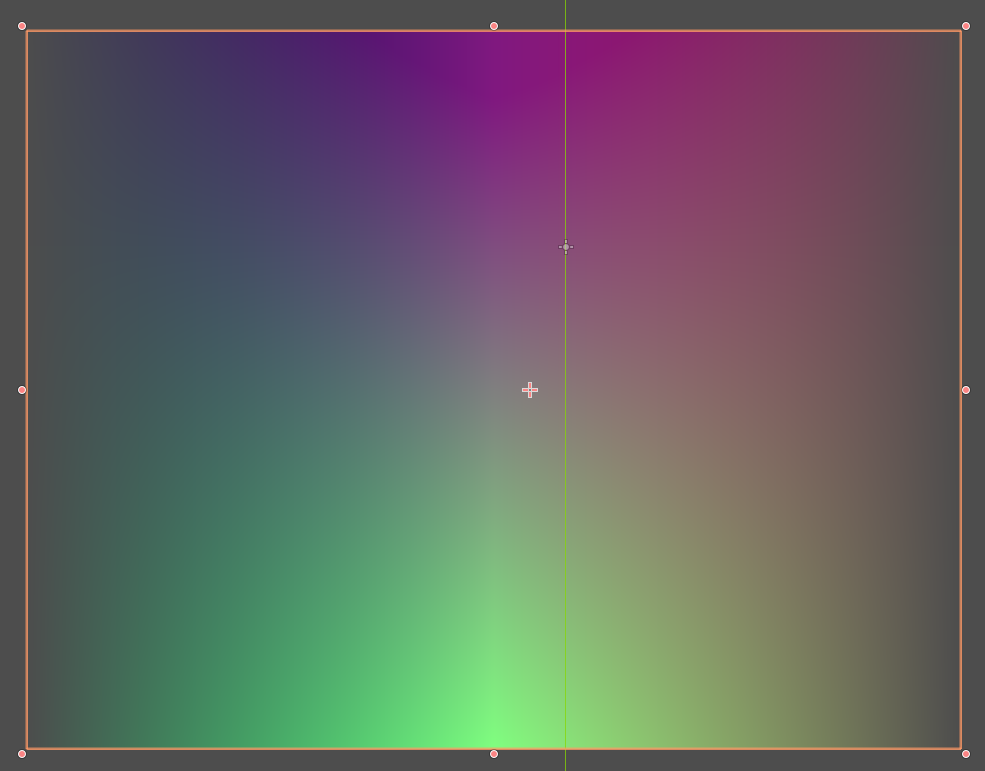
If we update our shader code to use this snippet from the Godot tutorial, we can visualize what’s happening to help understand:
shader_type canvas_item;

void fragment() {
  COLOR = vec4(UV, 0.5, 1.0);
}
Note that we are taking advantage of the fact that shader vector constructors are “smart”. The
vec4we construct is shorthand forvec4(UV.x, UV.y, 0.5, 1.0)
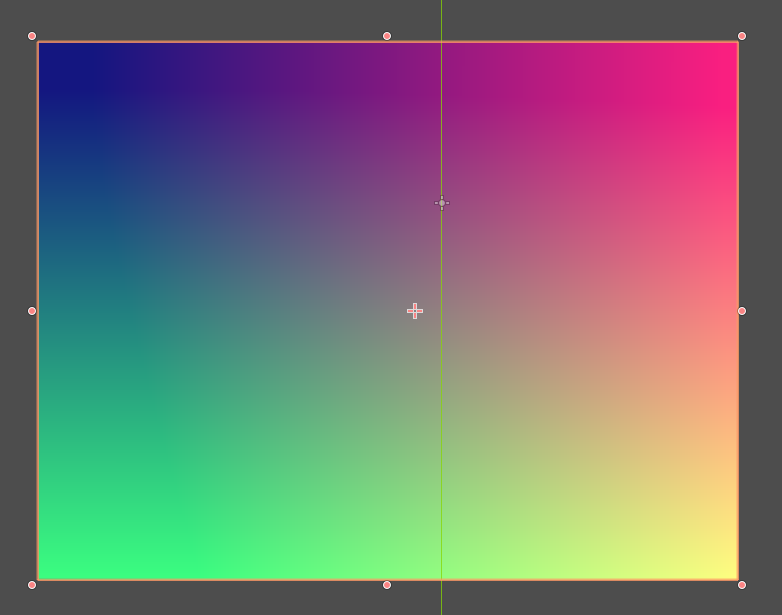
In this example, the red channel of our color is set based on U, while the green channel is based on V. We can see the image getting redder as U increases further right in the image. Likewise, we can see things get greener as V increases. At the bottom right of the image, both U and V are large, so we have a mix of red and green to give us yellow.
Transforming UVs
One very handy trick for UVs is transforming them using shifts and scaling. This can make the math easier for some tasks. For example, what if we want to adjust our current shader to fade out on the left and right sides?
We need a float to adjust our opacity, and a function that increases from [0.0, 0.5] and then decreases from [0.5, 1.0] (to correspond with our UV.x coordinate). Symmetry around 0.5 sounds annoying, it would be nice if we could use symmetry around zero…
Well, we can! Let’s create a variable to store our “shifted” UV: vec2 UV2 = vec2(UV.x - 0.5, UV.y);
A symmetric function we could use with it is absolute value abs. This gives us an output that’s larger on the edges and 0 at U=0, so we can do 1 - abs(UV2.x) as our function for the alpha channel:
shader_type canvas_item;

void fragment() {
  vec2 UV2 = vec2(UV.x - 0.5, UV.y);
  COLOR = vec4(UV, 0.5, 1.0 - abs(UV2.x));
}
If you look at the editor output for this shader, you’ll see that the edges are only semi-transparent. This is because our new UV goes from -0.5 to 0.5. We need to scale it to the range [-1, 1]: vec2 UV2 = vec2(2.0*(UV.x - 0.5), UV.y);. Now, our colors fade in and out:
TEXTURE
We’re going to need access to the original opacity of our texture. To do this in our shader, we can use:
COLOR = texture(TEXTURE, UV);
If we make this the last line in our shader, you’ll see that it simply leaves the image unchanged since the shader is just reading and outputting the texture unchanged.
Step
This appropriately named function will help us step up our shader game! The float version of it is simple:
step(float a, float b): If a > b, return 1.0 else return 0.0
To visualize what it’s doing, let’s update our shader to output this COLOR:
shader_type canvas_item;

void fragment() {
  COLOR.rgb = vec3(step(0.5, UV.x));
}
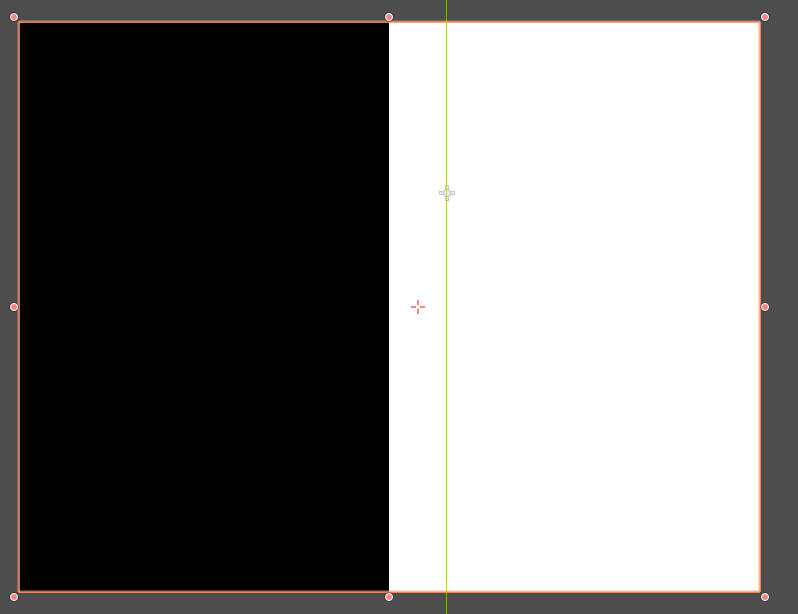
We can see how how the step function varies with our U coordinate. Our RGB is black (0,0,0) when U <= 0.5, and then becomes white (1,1,1) when U > 0.5.
Shader Params
For our final building block, we are going to use Shader params. This is a nifty feature in Godot shaders to let us control our shader parameters from the editor or regular Godot code. This can be helpful for debugging how a parameter behaves, and for controlling it via code. Let’s update our step shader to use a shader param:
shader_type canvas_item;
uniform float fac = 0.5;

void fragment() {
  COLOR.rgb = vec3(step(fac, UV.x));
}
The uniform float fac = 0.5 will expose the shader param to our editor:
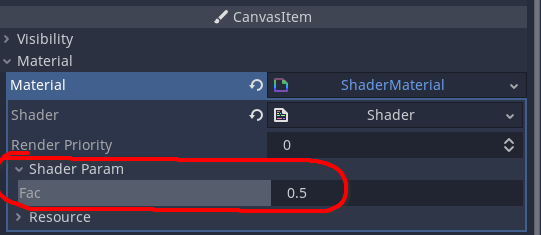
Now, we can slide around the value of fac and immediately see how our shader responds!
Putting it all together
We have everything we need to build our eyebrow shader, but how should we approach actually building it? First, let’s think of what we are actually trying to accomplish for one eye:
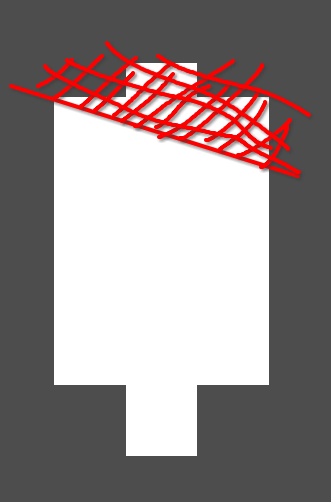
We want to have a line (that we can adjust) where everything above the line is transparent (i.e. we want to set the opacity of the pixels in the red shaded region to 0 to form our “eyebrow”). The step function is perfect for this.
Let’s take a simple line without an offset, putting u and v on the same side of the equation:
$$mu-v = 0$$
The two sides of this equation give us the two input arguments to our step function. If the left hand side is smaller than zero, then we make the pixel transparent.
$m$ will correspond to our shader param fac, so our shader code looks like
shader_type canvas_item;
uniform float fac = 0.5;

void fragment() {
  COLOR = texture(TEXTURE, UV);
  COLOR.a = COLOR.a * step(fac*UV.x-UV.y, 0.0);
}
We also multiply by
COLOR.aso pixels that were originally transparent remain so
We can adjust the fac shader param to control the slope and slope and see that it works as intended:
Making it symmetric
We were only considering a single eye to make the initial reasoning simpler. Now, we need to adjust our shader to use the same angle for both eyes. For our end result we want something like $y=m*abs(x)$ (which looks way too suspiciously like angry eyebrows)
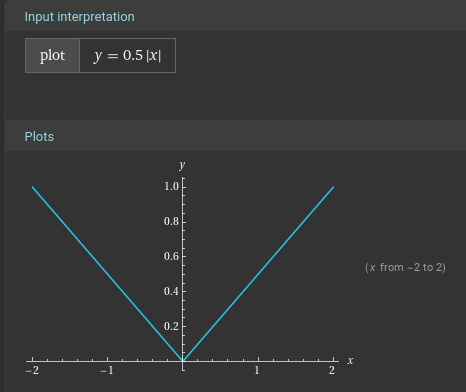
We can use our UV shifting trick to move our U values to the [-0.5, 0.5] range, and update our shader to use the absolute UV2.x value:
shader_type canvas_item;
uniform float fac = 0.5;

void fragment() {
  COLOR = texture(TEXTURE, UV);
  vec2 UV2 = vec2(UV.x - 0.5, UV.y);
  COLOR.a = COLOR.a * step(fac*abs(UV2.x)-UV2.y, 0.0);
}
But, if you adjust the fac shader param for this shader, you will notice a pretty large issue. Negative fac values will give “sad” eyebrows, but positive fac values don’t appear to do anything. What’s going on?
Up until now we’ve ignored the offset of our “eyebrow line”, but now we’ll need to address it. As fac changes, we’ll need to adjust the offset
value to put the center of the eyebrows at the desired y position. The exact number will depend on how you want the end result to look. In this case, I like using abs(fac) for the offset. Adding that offset to our line equation gives our final shader:
shader_type canvas_item;
uniform float fac = 0.5;

void fragment() {
  COLOR = texture(TEXTURE, UV);
  vec2 UV2 = vec2(UV.x - 0.5, UV.y);
  COLOR.a = COLOR.a * step(fac*-1.0*abs(UV2.x)-UV2.y+abs(fac), 0.0);
}
It’s very simple, but can add a lot of extra expressiveness to a game. And it saves us time and space compared to creating different sprites for each desired variation. Here’s how the final result looks:
Looking pretty sad at the end! If you want to randomly set the shader parameter at runtime, it’s easy to do so. Just attach a script to the same node as your shader:
func _ready() -> void:
    self.material.set_shader_param("fac", rand_range(-1.0, 1.0))
You could even tween the shader param to animate animate between happy and sad eyebrows!
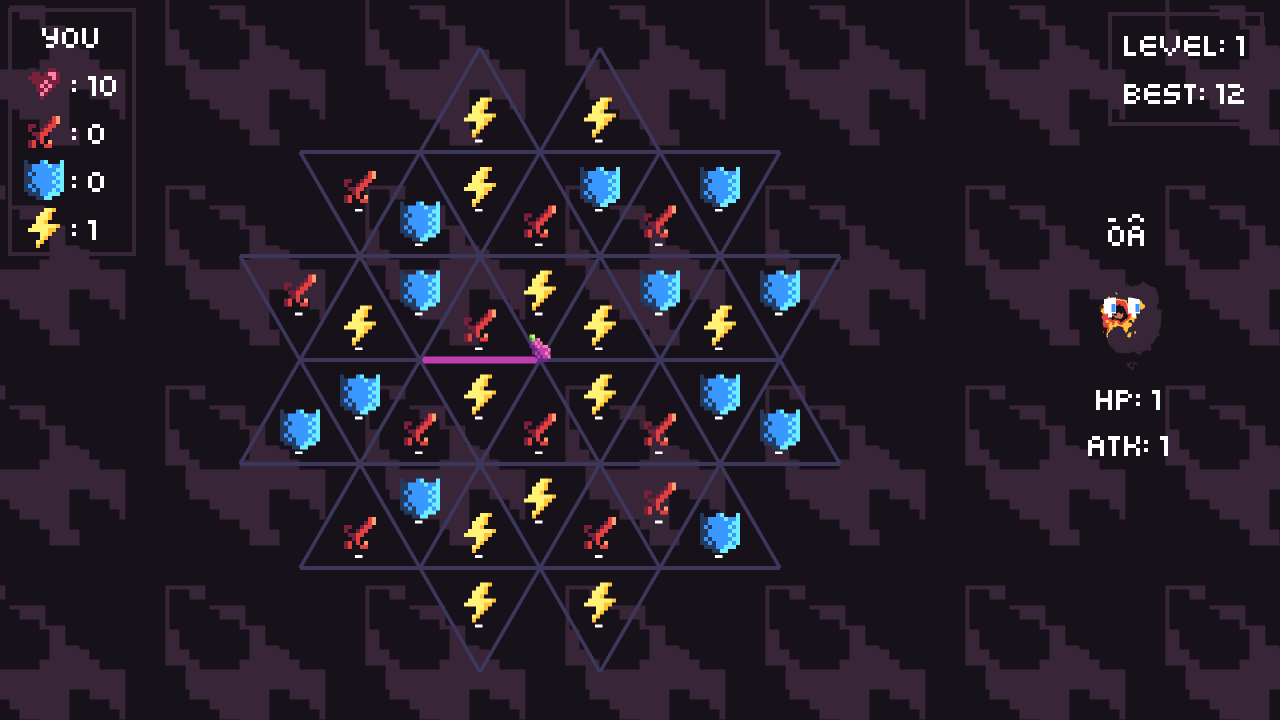
Give TriEdge Hack a try to see it (and some other fun shaders) in action.
Comments
With an account on the Fediverse or Mastodon, you can respond to this post. Since Mastodon is decentralized, you can use your existing account hosted by another Mastodon server or compatible platform if you don't have an account on this one. Known non-private replies are displayed below.